A very important feature of the M-III is the completely and extensively adjustable safety zones in which the power will be reduced. This way you can perform safe scans and projecting to the audience even with very powerful laser projectors.
Creating a safety zone and setting it up is done very easily and logically. You can set as many zones with any size and position as you want to. Those zones can be assigned other types of dim-out too and can be assigned from 1% to 100%. This way even zero-zones are possible.
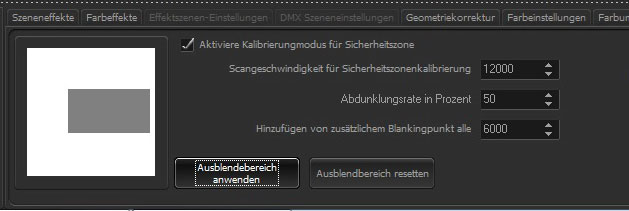
Select the “Safety Zones” tab. Here you can activate calibration mode. Now draw a rectangle at the editor. This will later on be our safety zone. Assign an output to the laser and move the projected rectangle at the editor window exactly to its position you want your safety zone to be at. By increasing or decreasing the rectangle at the editor window you can set up the area precisely. Usually this rectangle will be set to audience zone. Now set the dim-out rate. 20% would mean a dim-out of 20% and a brightness of 80% of total output. By checking “Apply Dim-out Zones” you now set the safety zones. You will recognize it as the grey rectangle at the preview box.
If you want to add additional zones, please repeat the steps shown before. By clicking on “Apply Dim-out Zones” you create another safety zone.
Now you can deactivate calibration mode and work on as usual. Safety zones are now active.
By clicking on the button “Reset Dim-out Zone” all safety zones will be deleted.
Hint: It’s common that we get calls from our users like “my projector does not have any power anymore”. Usually we find it that safety zones have been set and forgotten. We therefor recommend checking this tab regularly to avoid any mistakes.
Hi9nt: If you want to record a laser show with a camera, please draw a small safety zone around the camera to avoid damaging of the image sensor.